
Your truck is your baby and if you want to customize it to your own spec, then removing the old decals and vinyl stickering that either the manufacturer has placed on there, or a previous owner has slapped on could be your first step to truly making it your own. There’s nothing worse than having to put up with another person’s tacky stickers on your ride.
However, it an unfortunate fact there are many different levels of how hard and fast an old decal or vinyl stickers might be stuck to your truck. If they are new decals and have only been on for less than 12 months, then a lot of the time you can carefully peel them straight off and then do a clean-up and polish job.
But with the majority of vehicles, you’re going to have to go through a more thorough process in removing decals from truck doors and panels.
In this guide you will learn how to remove decals from truck doors the best way, either on the rear, the hood, and anywhere else for that matter where someone has stuck some old vinyl or stickers on that that you simply must remove.
How to Remove Truck Decals
I am going to take you through some tried and tested methodologies that involve:
- Removing the top layer of truck decal vinyl
- Cutting the decal away from the truck body
- Removing any glue or adhesive under the decal
- Removing any residue and marks left over
- Polishing up the affected area so it looks like new
How Badly Are the Decals Stuck On?
Based on my experience, there tends to be 2 levels of old truck decals and vinyl, and how stubborn they are stuck on. There’s the new ones which are way easier to remove, then the really old ones which will take a lot more work.
With new decals, it’s a lot easier to remove them from the doors and panels, and in many cases, you might just have to lift an edge and gently peel away.
But I am going to assume you’ve got some old truck body decals and stickers that are stuck on fast.
To remove them easily, cleanly, and with no mess, read on to find out the best way on how to remove factory decals from truck or custom vinyl stickers that have been retrospectively applied.
Removing Decals from Truck Doors & Body
If the vinyl and badging has been on there for some time, then here’s what you need to do in 5 simple steps.
Bear in mind, there is no specialist decal removing tool available on the market, so instead we will be using some tools that you might already own or will need to purchase.
What You Will Need
- Heat gun
- Fishing line or dental floss
- Microfiber cloths
- Plastic scrapers
- 3M Stripe Off Wheel attachment (optional)
- Rapid Remover spray bottle
Step 1: Use a Heat Gun to Soften the Adhesive
You’ve probably heard of the heat gun method, and there’s a good reason for that. It works and works really well.
Using a heat gun, work about an inch away from the decal, at around 75% heat. Working in uniform and circular motions work over the truck’s decal area for about 60 seconds.

What this does is warm up and loosen the adhesive underneath the decal, making it easier to remove in the next step.
I use a cheap heat gun and you can buy the same exact one on Amazon (view Amazon prices). It’s called the Genesis heat gun and can usually be picked up for less than twenty dollars. It offers variable heat settings and a range of nozzles. It’s a great product to have at your disposal.

You will know once you have heated the decal up enough as by pressing your fingers onto it and applying pressure you should feel some movement. If you feel that movement, then adhesive and glue has been softened up enough.
Step 2: Use Floss or Fishing Line to Cut the Decal Away
You can use either fishing line or some cheap dental floss for this step, it’s dead simple too.
All you do is pick a slight edge of the decal away with your fingers, and then wrapping the line around your fingers on both hand, pull the line behind the decal.
With a sawing motion back and forth, you can then cut through the warmed adhesive behind the factory decals, it’s almost like your sawing it off completely.
If you can’t saw through the glue, it means you haven’t warmed it up enough, or are working in too large an area. If this is the case, then go back to step one, and work on a smaller area instead.
Step 3: Use a 3M Stripe Off Wheel Attachment (Optional)
This next step is optional and depends on what you are left with once you have sawed the decal away.
If all you are left with is residue, then skip to step four where I show you how to remove the remaining adhesive.
But if you have some parts of the decal still stuck to your truck’s doors or body work, and this can be a problem with really old decal stickering, you should use a 3M Stripe Off Wheel attachment fixed to an electric drill.
By using rapid and circular motions, it uses friction rather than an abrasive finish so won’t scratch your truck doors and body work.
Using this attachment on a drill will remove any old decals left on the truck, and the majority of the glue.
Alternatively, you can use a scraper tool (see prices on Amazon) to get rid of any hard to remove truck decals. You can see this in action in the video below.
Step 4: Use a Microfiber Cloth and Polish Away Residue
There will be some residue left, so take a clean and un-used microfiber cloth (buy on Amazon) and working in circular motions, polish over where the decal marks are.
But, you’re still probably going to have some adhesive left, but in the step 5 I will show you a clean and harmless way you can get rid of the remaining mark and outline.
Step 5: Use Rapid Remover to Remove Truck Decal Glue
This product is an absolute must-have, as it will break down the remaining adhesive glue, letting you wipe it away in seconds for a brilliant finish.
It’s called Rapid Remover and does exactly what the product says; it removes the gunk underneath your removed decals and vinyl lettering in seconds.

Go take a look at it on Amazon, it doesn’t cost too much – click here to view Rapid Remover prices. I swear by it.
Spray over the remaining marks, leave for 60 seconds or so, then use a new and clean microfiber cloth work in circular motions and buff away any mess.
You should then have a completely clean truck door, with no evidence of old truck decals, vinyl letting, or outline marks – it really is that effective.
Once complete, polish your truck in the normal manner.
How to Remove Truck Decals That Are New
As I mentioned earlier, there are two types of decal, new and old, with the guide above giving you the steps you need for the older type that are stuck on hard and fast.
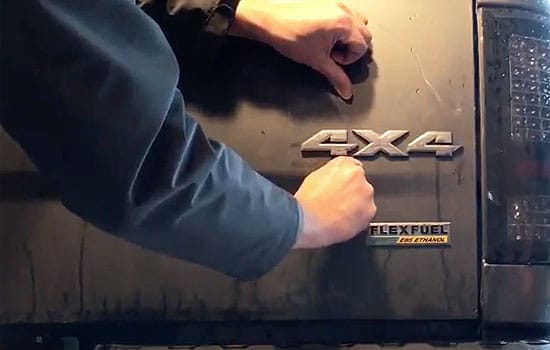
I also mentioned that new decals can often be removed simply by picking at an edge, and then gently peeling the vinyl and adhesive away. In the video below, you can see exactly how easy this is to do whether it’s a door or elsewhere on the truck’s body where some new decals are peeled off a Ford Super Duty.
You will probably still have some residue left over though, so will need to repeat the steps 4 and 5 from the guide above to remove any adhesive that remains.
Handy Hint:I’ve also put together a guide on how to remove old truck badges.
Knowing how to how to remove decals from truck doors is essential if you want to change up the appearance of your new truck, or perhaps purchased a used vehicle with some old company branding on it.
Whether it’s factory decals you want to remove from a truck door or rear, or something ugly that was stuck on by a previous owner, the steps above will get you to where you want to be in around 30 minutes.
The most important part in the process is the heat gun and the bottle of adhesive remover. The parts in the middle you should be able to do with a variety of methods, I’ve just featured my tried and tested for removing old truck door decals.
It’s worked each time for me.
The tricky part is always removing the adhesive, and this is where most trick owners will be concerned as they don’t want to damage the body work. Use microfiber cloths and you should be fine.
My last piece of advice is to not rush removing decals from a truck.
If you take a slap-dash approach you will risk leaving scratches, especially if you aren’t using the best tools for the job which I have outlined above.
The final step of polishing should never be neglected. If you leave any adhesive on and don’t clean it up properly, within 24 hours dirt and muck will be attached and it will look a lot worse than it did before, making your job even tougher.
Final Thoughts
So, there you have it. That should give you the easy way to remove truck decals with the minimum of stress and effort. For more tips and advice, please continue to explore the website!